Below is a step-by-step to set up your BEZA.NET e-mail account on an Apple iPhone or iPad.
To Set Up Your E-mail Account on Apple iPhone or iPad
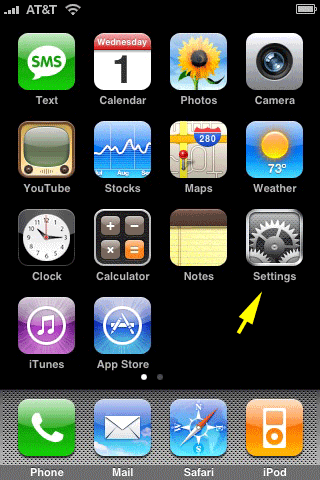
- From the Home screen on your iphone or iPad, choose Settings:
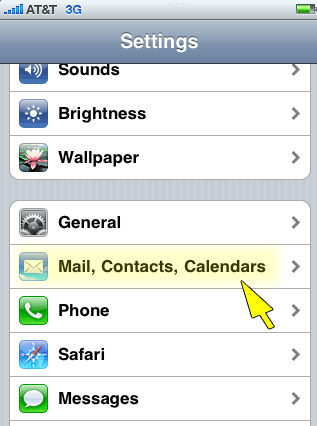
- Under Settings, select Mail, Contacts, Calendars:
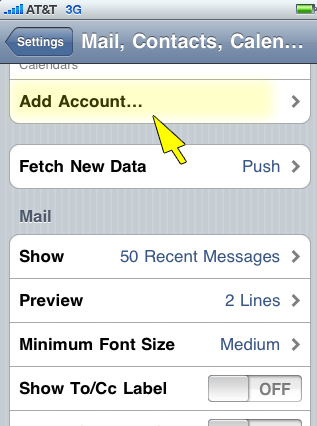
- Select Add Account...:
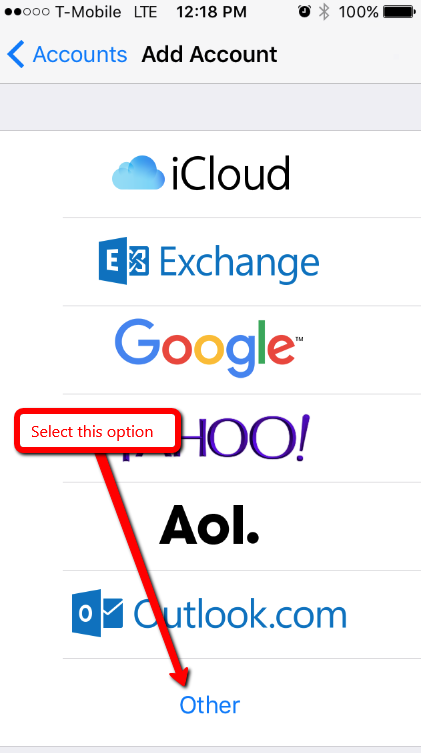
- Select Other as the type of account:
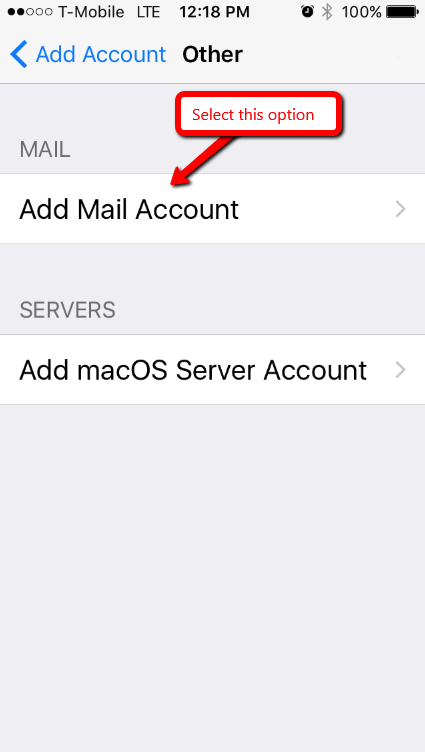
- Select Add Mail Account under the Mail section:
- Enter your information as follows:
Name
Enter your first and last name.
Address
Enter your e-mail address.
Password
Enter the password you set up for your e-mail account.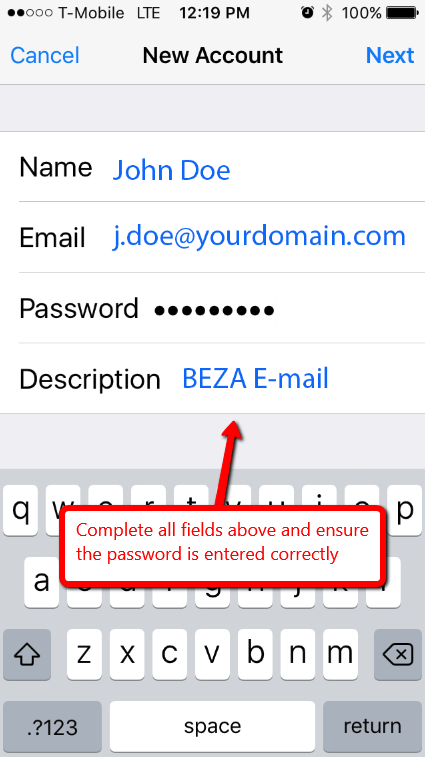
- Click Next.
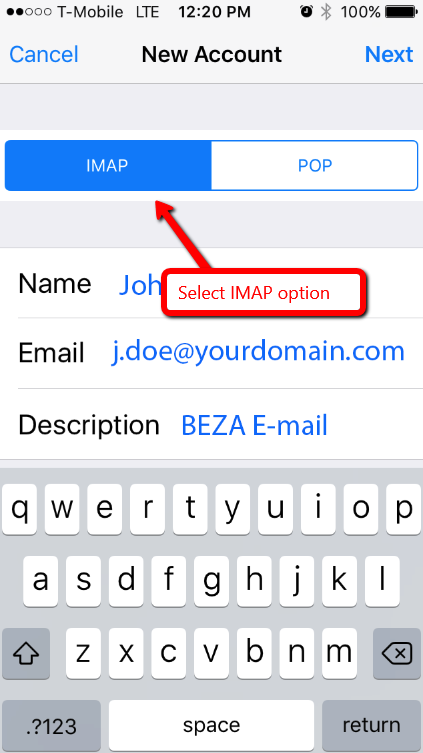
- Click IMAP (always recommended over POP):
- Enter the Incoming Mail Server information:
Host Name: enter mail.yourdomain.com (See note below)
User Name: enter the full email address (ie user@mydomain.com)
Password: enter the users password
NOTE: replace mail.yourdomain.com with the domain name you have registered in your BEZA control panel account. For example if your domain is mycompany.com, then Host Name should be mail.mycompany.com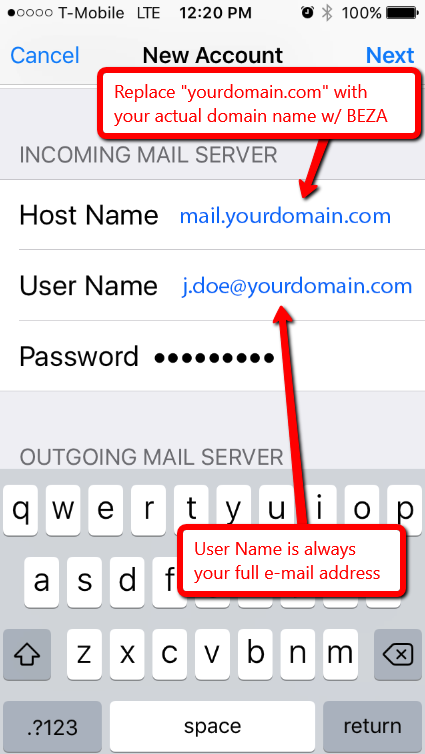
- Scroll down to the Outgoing Mail Server section and enter the same information as entered for Incoming Mail Server:
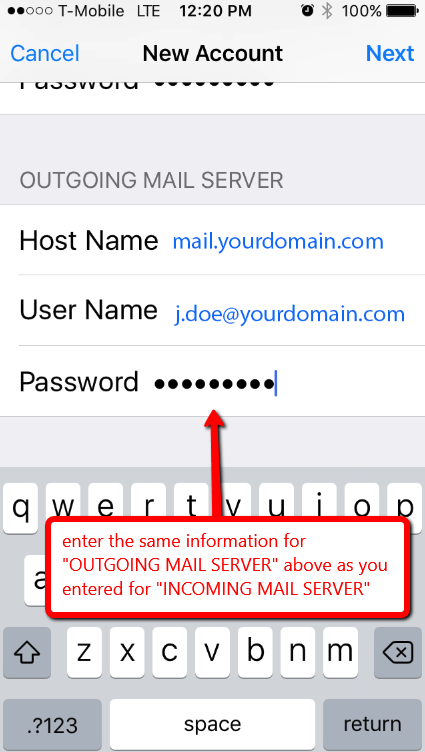
- Click Next.
- You may see a warning about "Cannot Verify Server identity." This is expected as you are connecting using yourdomain.com while all of BEZA mail servers are protected by a High Assurance SSL certificate under the *.beza.net or *.bezahosting.com domain name instead of yourdomain.com. If you see this message, please click Details:
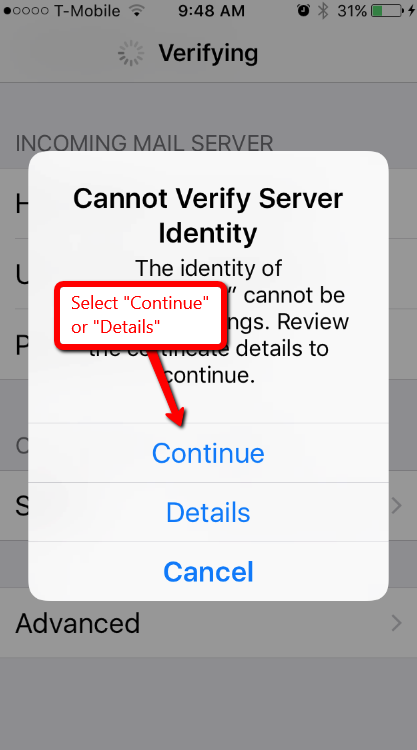
- Under the Certificate Details page, select Trust option to trust our SSL certidicates which are issued to *.beza.net or *.bezahosting.com:
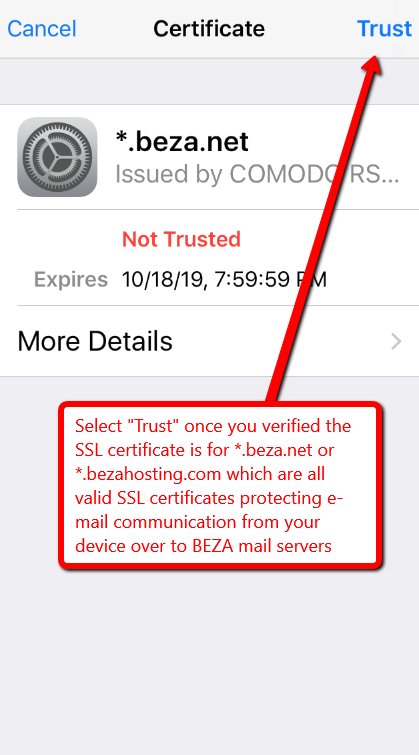
- Optional: In some cases, your iphone might not be able to connect via SSL to the mail servers. If you see a message that says "Cannot Connect Using SSL", click Yes when asked to setup the account without SSL.
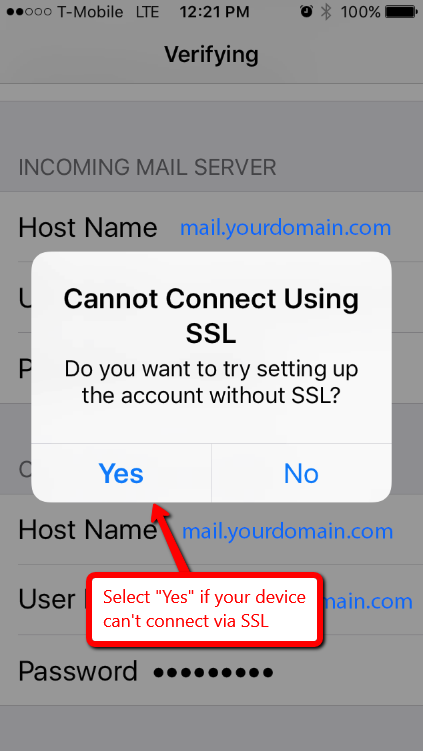
- Your iPhone will then verify your account information and if everything was entered correctly, your email account will be successfully setup.
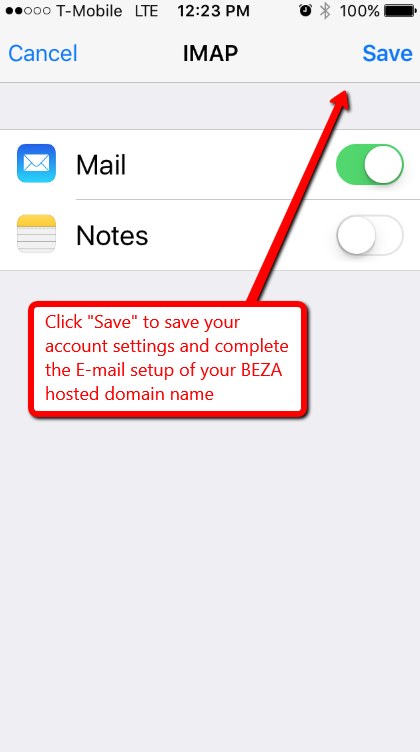
- Once the verification process is complete, click Save:
- From the Home screen on your iphone or iPad, choose Settings:


