Below is a step-by-step guide to set up Microsoft Entourage to work with your BEZA.NET e-mail account. These steps are similar for other versions of Microsoft Entourage.
To Set Up Your E-mail Account in Microsoft Entourage
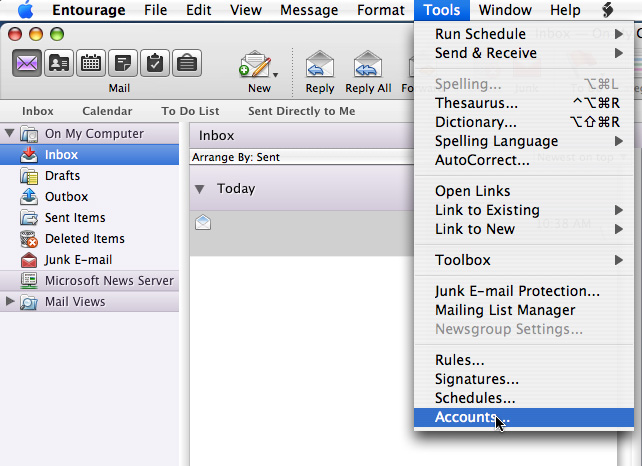
- Open Microsoft Entourage, go to the Tools menu and select Accounts.
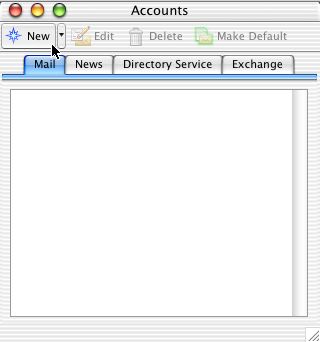
- On the "Internet Accounts" window, click on the Mail tab. Click and hold on the "New" button, moving your pointer over the "Mail..." label and release the mouse button.
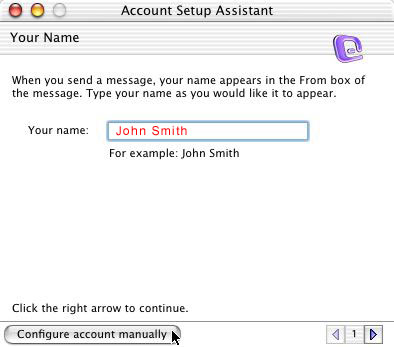
- When the "Account Setup Assistant" dialog starts, enter your full name as you wish it to appear on all outgoing email and click Configure account manually at the bottom left of this window.
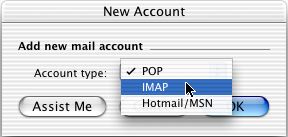
- In the New Account window, choose IMAP and click OK.
- Open Microsoft Entourage, go to the Tools menu and select Accounts.
- In the Edit Account window, on the Account Settings tab, enter the following information:
- Account Name:
- Enter BEZA E-mail Account (or something unqiue to identify this account from others you might have).
- Select checkox next to Include this account in my "Send & Receive All" schedule.
Name:
Enter your full name as you wish it to appear on outgoing e-mail. - E-mail Address:
- Enter your full e-mail address
- Account ID:
- Enter your full e-mail address, again.
- IMAP Server
- Enter mail.beza.net for IMAP server. (See note below)
NOTE: replace mail.beza.net with mail.yourdomain.com where yourdomain.com is the domain you have registered in your BEZA control panel account. For example if your domain is mycompany.com, then the IMAP and SMTP server should be mail.mycompany.com - Password
- Enter your e-mail password.
- SMTP server:
- Enter mail.beza.net for the smtp erver. (See note below)
NOTE: replace mail.beza.net with mail.yourdomain.com where yourdomain.com is the domain you have registered in your BEZA control panel account. For example if your domain is mycompany.com, then the POP3 and SMTP server should be mail.mycompany.com 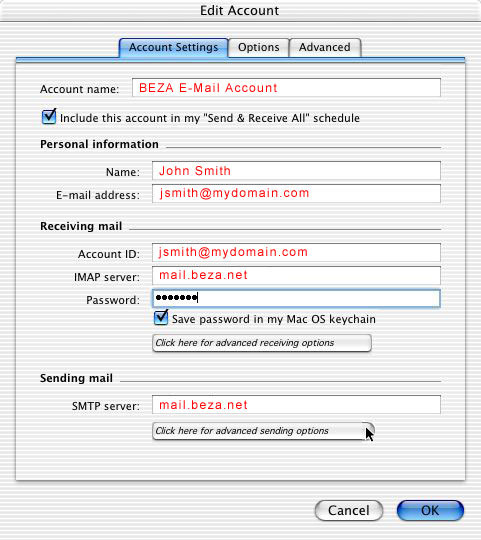
- Click on the Click here for advanced sending options button and set the following options:
- - Select the checkbox next to Override default SMTP port and enter 587 for SMTP port.
- Select the checkbox next to SMTP server requires authentication and ensure the Use same settings as incoming mail server is selected. elect the checkbox next to Enter BEZA E-mail Account (or something unqiue to identify this account from others you might have). 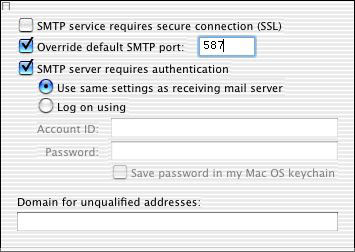
- - Select the checkbox next to Override default SMTP port and enter 587 for SMTP port.
- Click OK and try to check your new e-mail.
